
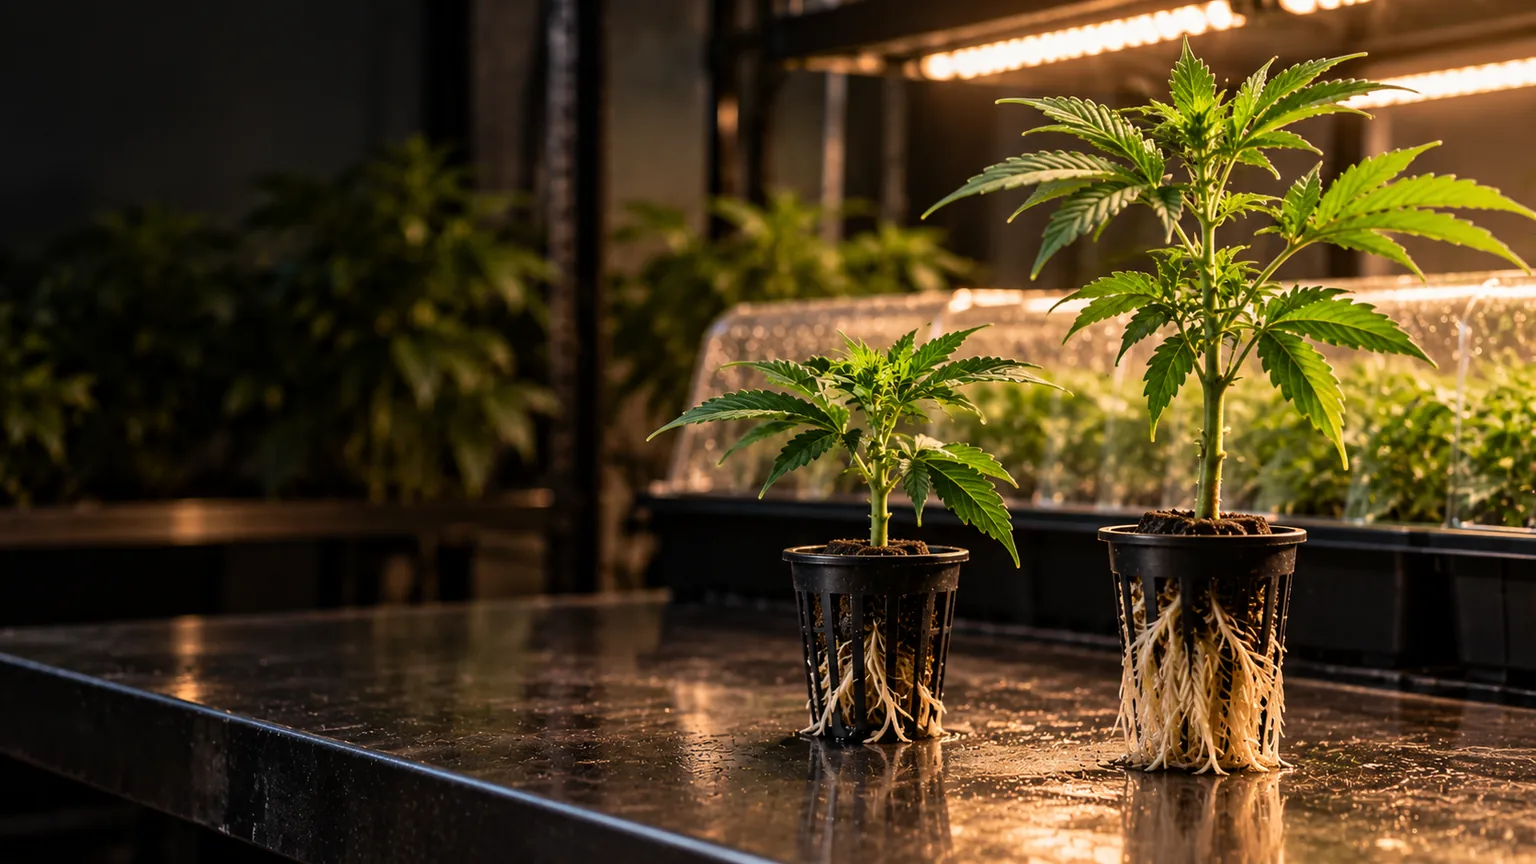
A taller cutting can begin with more stored tissue and developed nodes, but it also has more foliage to keep hydrated before roots form. Choose a healthy shoot and match its size to the rooting conditions—not to a promise of bigger harvests.
What changes when you take a larger cutting?
Length changes the amount of shoot, leaf area and stem tissue a rootless cutting must support. Very short cuttings can lack mature nodes or usable stem; very leafy, tall cuttings can lose water faster than a rooting system can replace it. Neither extreme is automatically the right choice.
Fit closely spaced trays and have a smaller canopy to support. Avoid weak tips that have too few healthy nodes or limited leaf area.
Prioritize maturity over the shortest stem.Convenient to handle, commonly with several nodes and enough leaves to support new growth. Manage humidity, clean cuts and sufficient rooting-media contact.
A useful starting point, not a magic length.May have greater reserves and a developed stem, but require more room and careful moisture management while roots are absent.
Evaluate root establishment before claiming an advantage.In a 2026 study of cannabis stem cuttings, 20 cm cuttings rooted more often than the other tested lengths under that protocol. The finding supports examining longer cuttings; it does not demonstrate that every large cutting roots faster, or that starting height determines mature bud yield. Mother condition, cultivar and rooting environment still matter.
Two demands, one unrooted cutting
Leaves help provide energy for new roots, yet they also lose water. The amount of foliage and the available moisture control should be considered together. This schematic compares the care priorities, not guaranteed root mass.
A larger shoot needs a stronger moisture plan
Healthy leaf area helps sustain rooting. Remove lower leaves that would be buried or submerged; avoid stripping the top bare.
Minimize time between cutting and placement. Appropriate humidity and gentle light help protect unrooted foliage.
Harvest shoots without stripping the remaining plant of enough active branches to recover and regrow.
Prepare the plant, tools and rooting station
Pick an actively growing, clean shoot
Avoid pest damage, wilting, flower formation and excessively woody material. A strong mother is more useful than a visually impressive cutting from a stressed plant.
Prepare the rooting system first
Have sanitized tools, moist rooting medium or a serviced cloning machine ready. Choose plugs, collars and tray openings that physically fit the cutting.
Make one clean cut and protect the stem
Use sharp tools, work promptly and follow the rooting product's label if one is used. The cloning walkthrough covers the full cutting and rooting procedure.
Inspect daily rather than assuming a deadline
Look for stable leaf condition, clean stems, developing roots and signs of excessive moisture. A cloner does not make success automatic; clone water and nutrition also matter.
A rooted clone is not necessarily ready to move
Look for multiple healthy, pale roots that can tolerate transfer, resilient foliage and the first signs of new shoot growth. A single tiny root tip or a tall stem is not sufficient evidence of readiness. Avoid unnecessary time in a crowded machine once the root system is well established.
Rooted cuttings can be introduced to the next medium gently; start with a compatible moisture regime and appropriate light.
Check water temperature, sanitation, root oxygen, irrigation and plant health before moving the clone.
The vegetative growth guide explains the next stage, while clone machine selection covers equipment. Moving a clone directly into flowering is a layout and plant-management choice, not a universal faster route to heavier buds.
What the early clone-machine observations showed
The original grower described taking cuttings around 3–5 inches tall from mother plants, seeing roots after roughly a week in a custom-built clone machine, and allowing additional time for the roots to develop before transfer. Those are observations from one setup, not a guaranteed rooting timetable or proof that cutting size alone controls final flower production.
The original plant image remains here at its natural proportions, alongside the documented propagation notes.

To see the equipment used in that style of setup, visit the custom made clone machine build and video guide. Once transplanted, keep plants on the appropriate schedule for the flowering stage only when they are established and the grow plan calls for it.
Further reading
Plants (2026): Cannabis cutting morphology and rooting success examines length and rooting in one tested protocol. Iowa State Extension: Stem tip cuttings explains hydration, nodes and propagation care. Findings depend on plant species and growing conditions.